Heat and touch • Automotive Leather
How do dashboards and door panels fail differently?
Dashboards and door panels share a vehicle but not the same stress pattern.
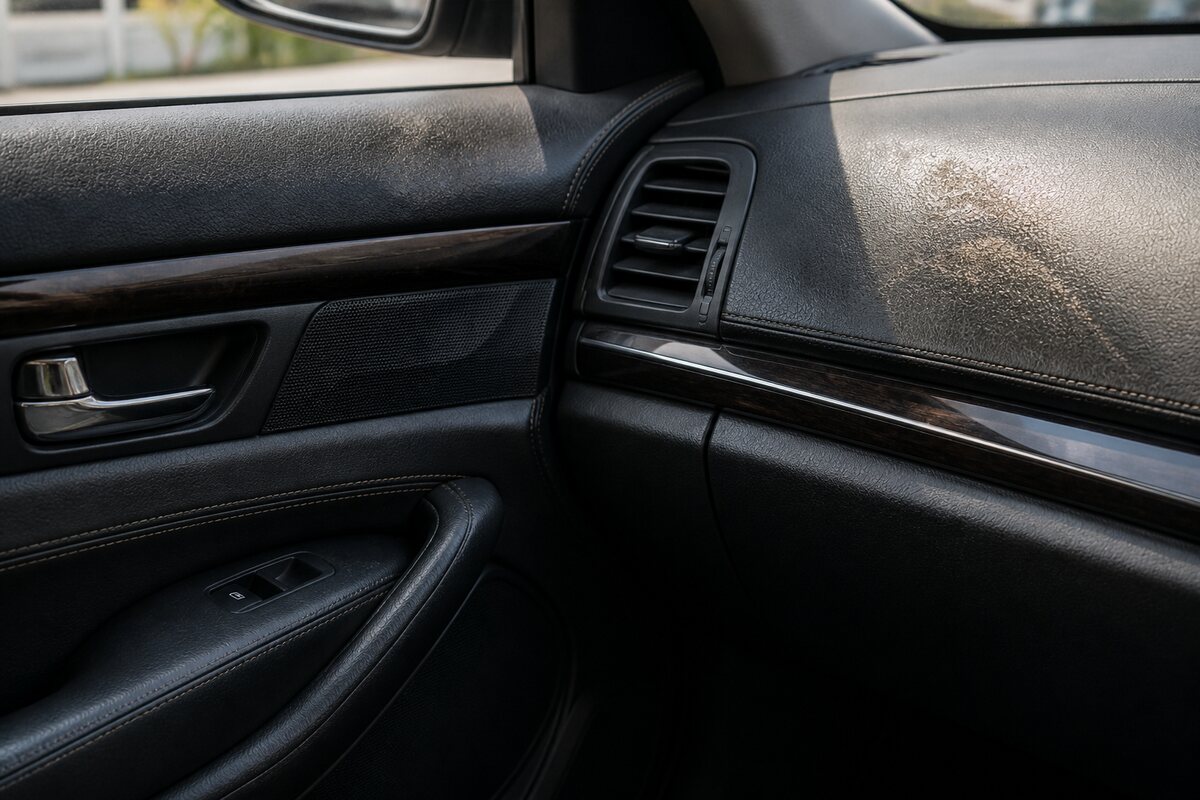
A dashboard sees sun and heat through glass; a door panel sees hands, belts, shoes and repeated edge contact. Finish gloss, shrinkage, bubbling and color change can therefore mean different things.
Begin with the material identification and the panel construction. Coated vinyl can resemble leather, and a repair that bonds well to one substrate may fail on another.
The atlas turns the symptom into a question set before it names a product family.
One cabin creates different climates
The same behaviour shows up in another setting, described in as leather care reference.
For the fuller treatment of that point, see working notes.
The upper dashboard sits behind glass and receives intense light and heat with little direct handling. A door pull, armrest and lower kick panel receive hands, clothing, shoes and repeated cleaning. The materials may also differ: leather, coated split, molded vinyl and wrapped synthetic panels can share color and printed grain. A cabin-wide product chosen from appearance alone can therefore behave differently on every panel it touches.
Start with a location map. Note the side of the vehicle, orientation to sun, ventilation outlets, high-contact zones and any windshield treatment that may have been sprayed nearby. Compare a horizontal dash surface with a shaded vertical face on the same component. A change that follows the light boundary suggests a different cause from a glossy hand-shaped patch around a pull.
Read heat, touch and residue separately
Fading is a color relationship: compare exposed and sheltered sections in neutral light. Shrinkage changes fit and can pull edges away from trim. Bubbling suggests a bond or layer problem beneath the visible skin. Gloss around controls can be hand residue, polished coating or both. Tackiness may come from contamination or material degradation. Those symptoms should not be compressed into "dry dashboard" because each leads to a different stop condition.
Clean only after material identification and a small test. Avoid flooding switches, seams and bonded edges. A dressing that makes a panel uniformly shiny can hide the contrast used to diagnose wear, and a slippery result is unsuitable on controls. The coated-surface identification guide helps separate a leather-looking texture from the substrate beneath it.
Inspect construction before repair products
Look at accessible edges around a glove box, removable trim or the underside of a loose component without dismantling safety systems. Record backing, thickness, stitch method and whether the visible layer is wrapped or molded. Adhesives and flexible coatings are selected around that construction. A patch that bonds to leather may not flex or age correctly on vinyl, while a strong solvent can damage an adjacent plastic component.
Do not lift a bubble, cut an edge or sand a sticky coating simply to identify it. Those actions convert an uncertain symptom into permanent damage. Photograph scale and movement, then use the Diagnostic Atlas to state what remains unknown. A professional trim shop can often identify construction from vehicle documentation and panel access that an owner should not create.
Plan a cabin-level result
A local repair should be judged from the driver's normal view, not only from a close bench photograph. Color, grain, sheen and reflected light connect the repaired section to surrounding trim. A technically sound matte patch can stand out on an aged satin door card; an over-glossed dash can create distracting reflection. Set the desired integration before selecting a finish system.
Record aftercare by panel rather than applying one routine everywhere. A high-touch armrest may need more frequent gentle cleaning, while the upper dash benefits most from reducing exposure and residue. Stop and seek specialist help when layers separate, edges shrink, controls are affected or the material remains tacky after a mild clean. Those are construction or compatibility questions, not invitations to add more dressing.
Source note: Leather Naturally. Accessed August 25, 2026.